Hand Embroidery Guide: Learn & Explore Stitches

Embroidery Stitch Guide
A Complete Guide for Beginners and Beyond
Whether you're just picking up a needle for the first time or looking to refresh your stitching skills, you're in the right place. This page is a curated collection of some of the best stitching tutorials available on YouTube — carefully selected to help you learn the basics and master advanced techniques.
From simple running stitches to decorative embroidery, we offer step-by-step guidance for 29 essential stitches below. Use this as your stitching reference library — start at the beginning or jump to the stitches you want to perfect.
Note: All video tutorials are created by talented content creators on YouTube and shared here for educational purposes.
Prepare for Stitching
Getting Ready
Using a Needle Threader
🪡 Needle drama? Not anymore! Learn how to thread a needle like a pro with this quick & easy video using a needle threader. Perfect for beginners or anyone who ever squints trying to get that thread through the eye. Say goodbye to frustration and hello to smooth stitching!
Knotting the Thread
🧵 Tie it right, stitch with confidence! This video walks you through the easy way to knot your thread so your stitches stay secure. Ideal for beginners and seasoned stitchers alike — no slipping, no fuss.
Using the Embroidery Hoop
Learn the art of hooping fabric in this quick tutorial — the right tension, positioning, and tips for a beautiful, stable base. A taut, well-hooped canvas makes every stitch smoother and more precise. Ideal for beginners and seasoned stitchers alike.

How about Stitching Along?
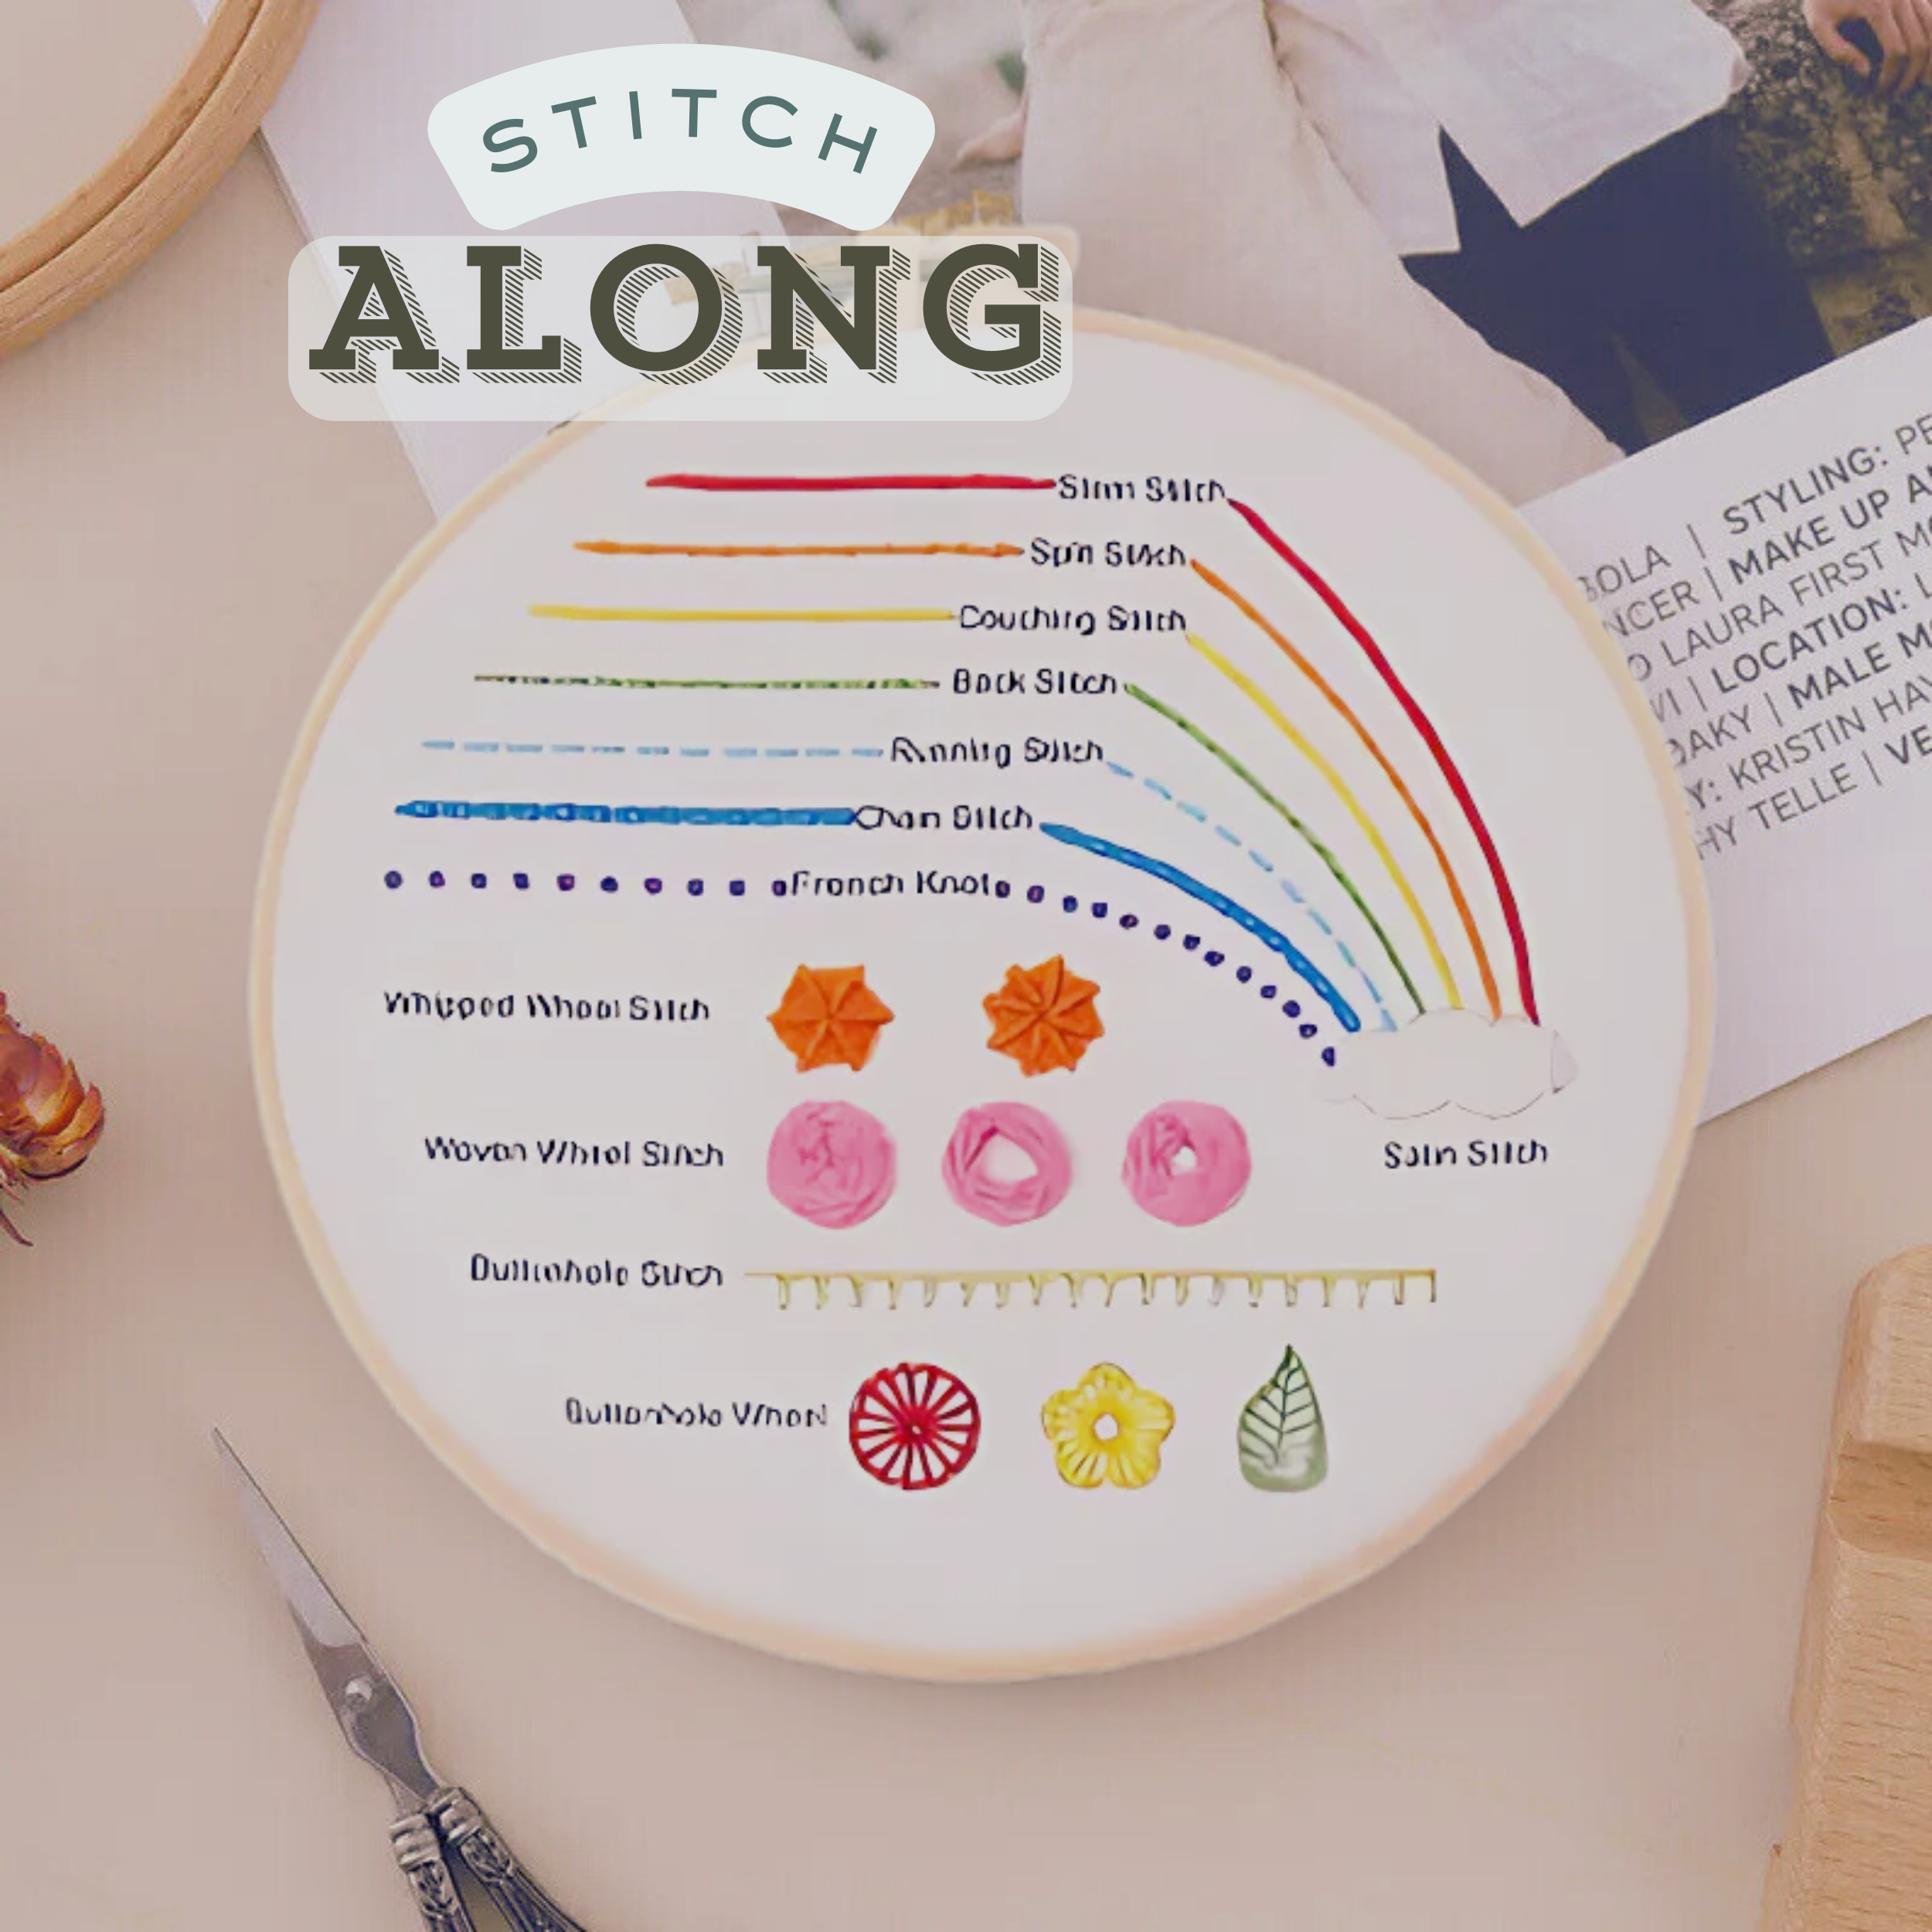
We offer a kit with three different sets of essential stitches. They provide you with an interesting way to practice while following the guide. Watching is fun, but stitching is better. Open your kit and let’s do this together! Order your kit now!
Click on a stitch to learn how to stitch it
Embroidery Stitches

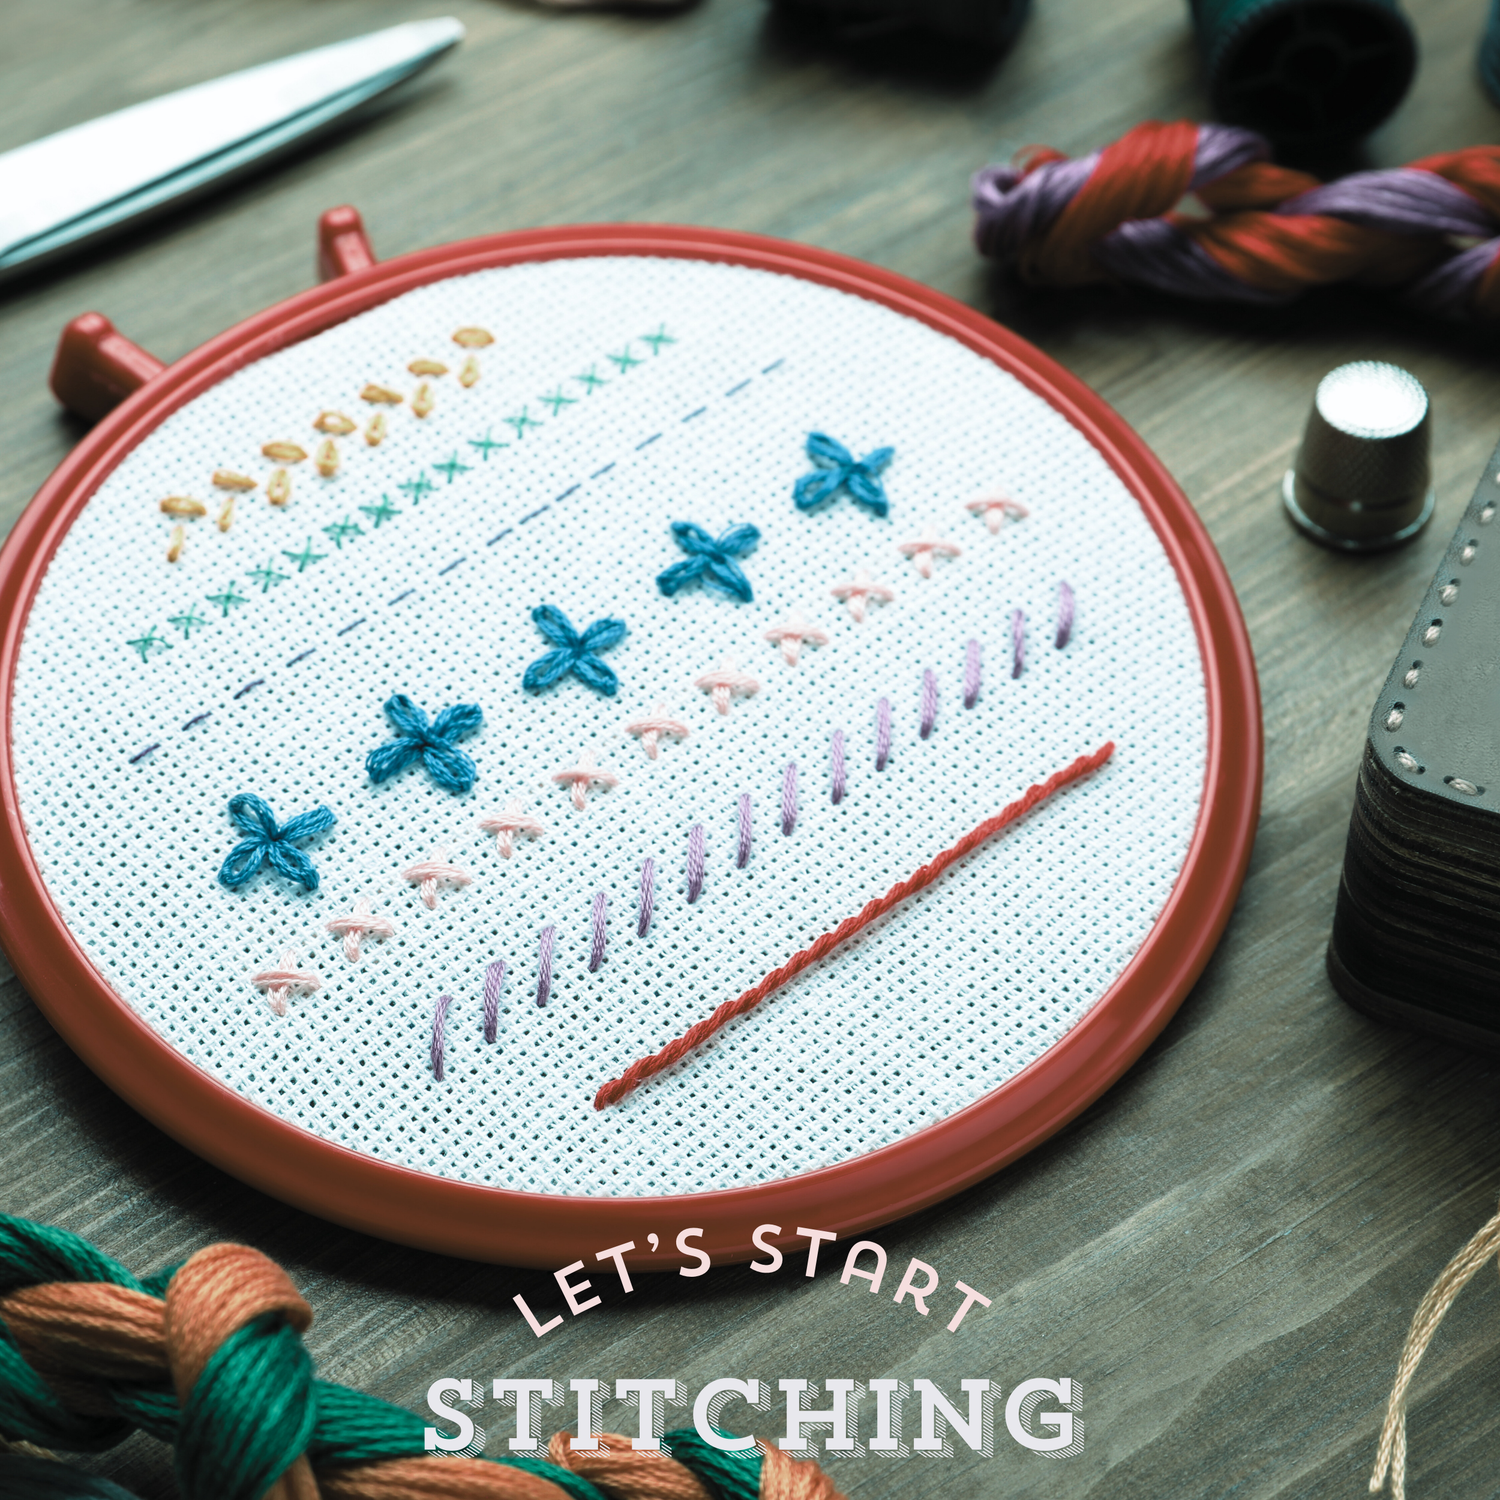
Stem Stitch
The stem stitch is a versatile, beginner-friendly embroidery stitch that creates a smooth, slightly twisted line — perfect for outlining shapes, lettering, or creating flowing lines like flower stems and vines (hence the name!).

It’s worked by bringing the needle up through the fabric, then taking it back down a short distance along your line, and bringing it back up again halfway between the previous stitch and where your thread first came out. The working thread usually stays either above or below the needle consistently to create the signature rope-like effect.
Once mastered, the stem stitch becomes a go-to for adding elegant, clean detail to your embroidery work.
Tip: Keep your stitches short and even for smooth curves, or slightly longer for flowing lines.
Split Stitch
The split stitch is a simple and versatile embroidery stitch often used for outlines, lettering, or filling shapes. It creates a slightly textured line that looks like a tiny chain of rope.
How to do it:
- Bring the needle up through the fabric at your starting point.
- Make a small straight stitch forward, then bring the needle back up through the middle of that stitch, splitting the thread.
- Repeat this process—always bringing the needle up through the center of the previous stitch—to form a continuous line.
Tips:
- Keep stitches short for a neat, smooth line.
- Slightly longer stitches will give the line more texture.
- Works beautifully for curves and outlines.
Couching Stitch
The couching stitch is an embroidery technique used to secure a length of thread, yarn, or ribbon onto the surface of the fabric. Instead of passing the main thread in and out of the fabric, it is laid on top and held down with small stitches. This creates bold outlines, decorative textures, or allows you to use threads too thick to stitch through the fabric.
How to do it:
- Lay your main thread (the one to be couched) across the fabric in the desired shape or line.
- Bring a second thread (the couching thread) up through the fabric right next to it.
- Take a tiny stitch over the laid thread, securing it to the fabric, and go back down through the fabric.
- Repeat at even intervals until the entire line is held down.
Tips:
- Use a contrasting couching thread for decorative effect, or match it to the laid thread to make it invisible.
- Spacing between couching stitches can be varied for texture.
- Often used in goldwork, lettering, and bold outlines.
Backstitch
The backstitch is one of the most versatile and widely used embroidery stitches. It creates a strong, continuous line that’s perfect for outlines, lettering, and adding fine details to your designs.
To work the backstitch, bring the needle up through the fabric, take a stitch backward along the line, then bring the needle up a short distance ahead to repeat. The stitches connect neatly, forming a smooth, solid line.
Because of its durability and precision, the backstitch is often used for both decorative embroidery and practical sewing.
Uses: outlining, lettering, detail work, sewing seams.
Running Stitch
The running stitch is one of the simplest and most fundamental embroidery stitches. It creates a dashed line made up of small, even stitches and spaces.
To work the running stitch, bring the needle up through the fabric, then weave it in and out along your line, keeping the stitches and gaps as even as possible.
This stitch is lightweight and versatile — often used for outlines, decorative borders, or gathering fabric. It’s also a great beginner stitch for practicing control and spacing.
Uses: outlining, borders, quilting, gathering fabric.
Chain Stitch
The chain stitch is a classic embroidery stitch that creates a linked, chain-like line. It’s decorative yet versatile, often used for outlines, borders, or filling shapes with texture.
To make a chain stitch, bring the needle up through the fabric, loop the thread under the needle, and pull through to form a loop. Repeat by inserting the needle a short distance ahead and catching the loop each time. The result is a series of interlocking “chains.”
Uses: outlines, borders, lettering, filling areas with texture.
French Knot Stitch
The French knot is a decorative stitch that creates small, raised dots on the fabric surface. It’s perfect for adding texture, detail, and accents like flower centers, eyes, or scattered embellishments.
To make a French knot, bring the needle up through the fabric, wrap the thread around the needle once or twice, then insert the needle back into the fabric very close to the starting point (but not in the exact same hole). Pull the thread gently to form a neat little knot on the surface.
Uses: texture, flower centers, accents, scattered decorative details.
Whipped Wheel Stitch
The whipped wheel stitch is a decorative, circular stitch that creates a raised, woven effect resembling a flower or rosette. It adds texture and dimension, making it a favorite for floral motifs and bold embellishments.
To work the whipped wheel, start by stitching straight lines (spokes) radiating out from a center point, like a wheel. Then, bring the thread up near the center and weave it over and under the spokes in a circular motion until the wheel is filled. The weaving builds a raised, textured effect.
Uses: floral designs, circular motifs, textured embellishments.
Woven Wheel Stitch
The woven wheel stitch is a beautiful, textured embroidery stitch that creates a rose-like circular motif. It’s especially popular for floral designs because of its raised, woven appearance.
To make the woven wheel stitch, begin by stitching an odd number of straight stitches (spokes) radiating from a center point. Then bring the needle up near the center and start weaving the thread over and under the spokes in a spiral motion. Continue weaving until the spokes are covered and the “wheel” looks full.
Uses: flowers, circular motifs, textured accents.
Buttonhole / Blanket Stitch
The buttonhole stitch (also called blanket stitch) is a versatile edging stitch that creates a neat row of linked loops. It’s traditionally used to reinforce buttonholes and fabric edges, but it’s also a favorite decorative stitch in embroidery.
To make the buttonhole stitch, bring the needle up at the fabric edge, insert it a short distance away, and bring the needle back out at the edge while catching the working thread under the needle tip. Pull through to form a loop along the edge, then repeat. The result is a line of evenly spaced loops.
Uses: edging, borders, appliqué, decorative outlines, reinforcing buttonholes.
Buttonhole / Blanket Wheel Stitch
The buttonhole wheel stitch is a circular variation of the buttonhole stitch, forming a decorative wheel or flower-like shape. It adds texture and works beautifully for floral motifs, mandalas, or round accents.
To make the buttonhole wheel, bring the needle up at the circle’s edge. Insert the needle back into the center and, as you bring it out again on the circle’s edge, catch the thread under the needle to form a loop. Continue working evenly around the circle until it’s complete, creating a ring of buttonhole stitches radiating from the center.
Uses: flowers, circular motifs, textured decorative accents.
Satin Stitch
The satin stitch is a smooth filling stitch used to cover areas of fabric with solid blocks of color. It creates a shiny, satin-like surface, making it ideal for petals, leaves, and other shapes that need a bold, filled look.
To make the satin stitch, bring the needle up at one edge of the shape, then insert it at the opposite edge, laying the thread flat across the fabric. Continue placing stitches side by side, close together, until the shape is completely filled. Keeping the stitches even and parallel gives the best finish.
Uses: filling shapes, petals, leaves, bold decorative details.
Embroidery Stitch Kits
-

Essential Stitches Collection – Sampler Kit 1 | Beginner Embroidery Kit | Pre-Printed DIY Craft Set
Regular price $26.99 USDRegular price$29.52 USDSale price $26.99 USDSale -

Essential Stitches Collection – Sampler Kit 2 | Beginner Embroidery Kit | Pre-Printed DIY Craft Set
Regular price $26.99 USDRegular price$29.52 USDSale price $26.99 USDSale
And More
Embroidery Stitches

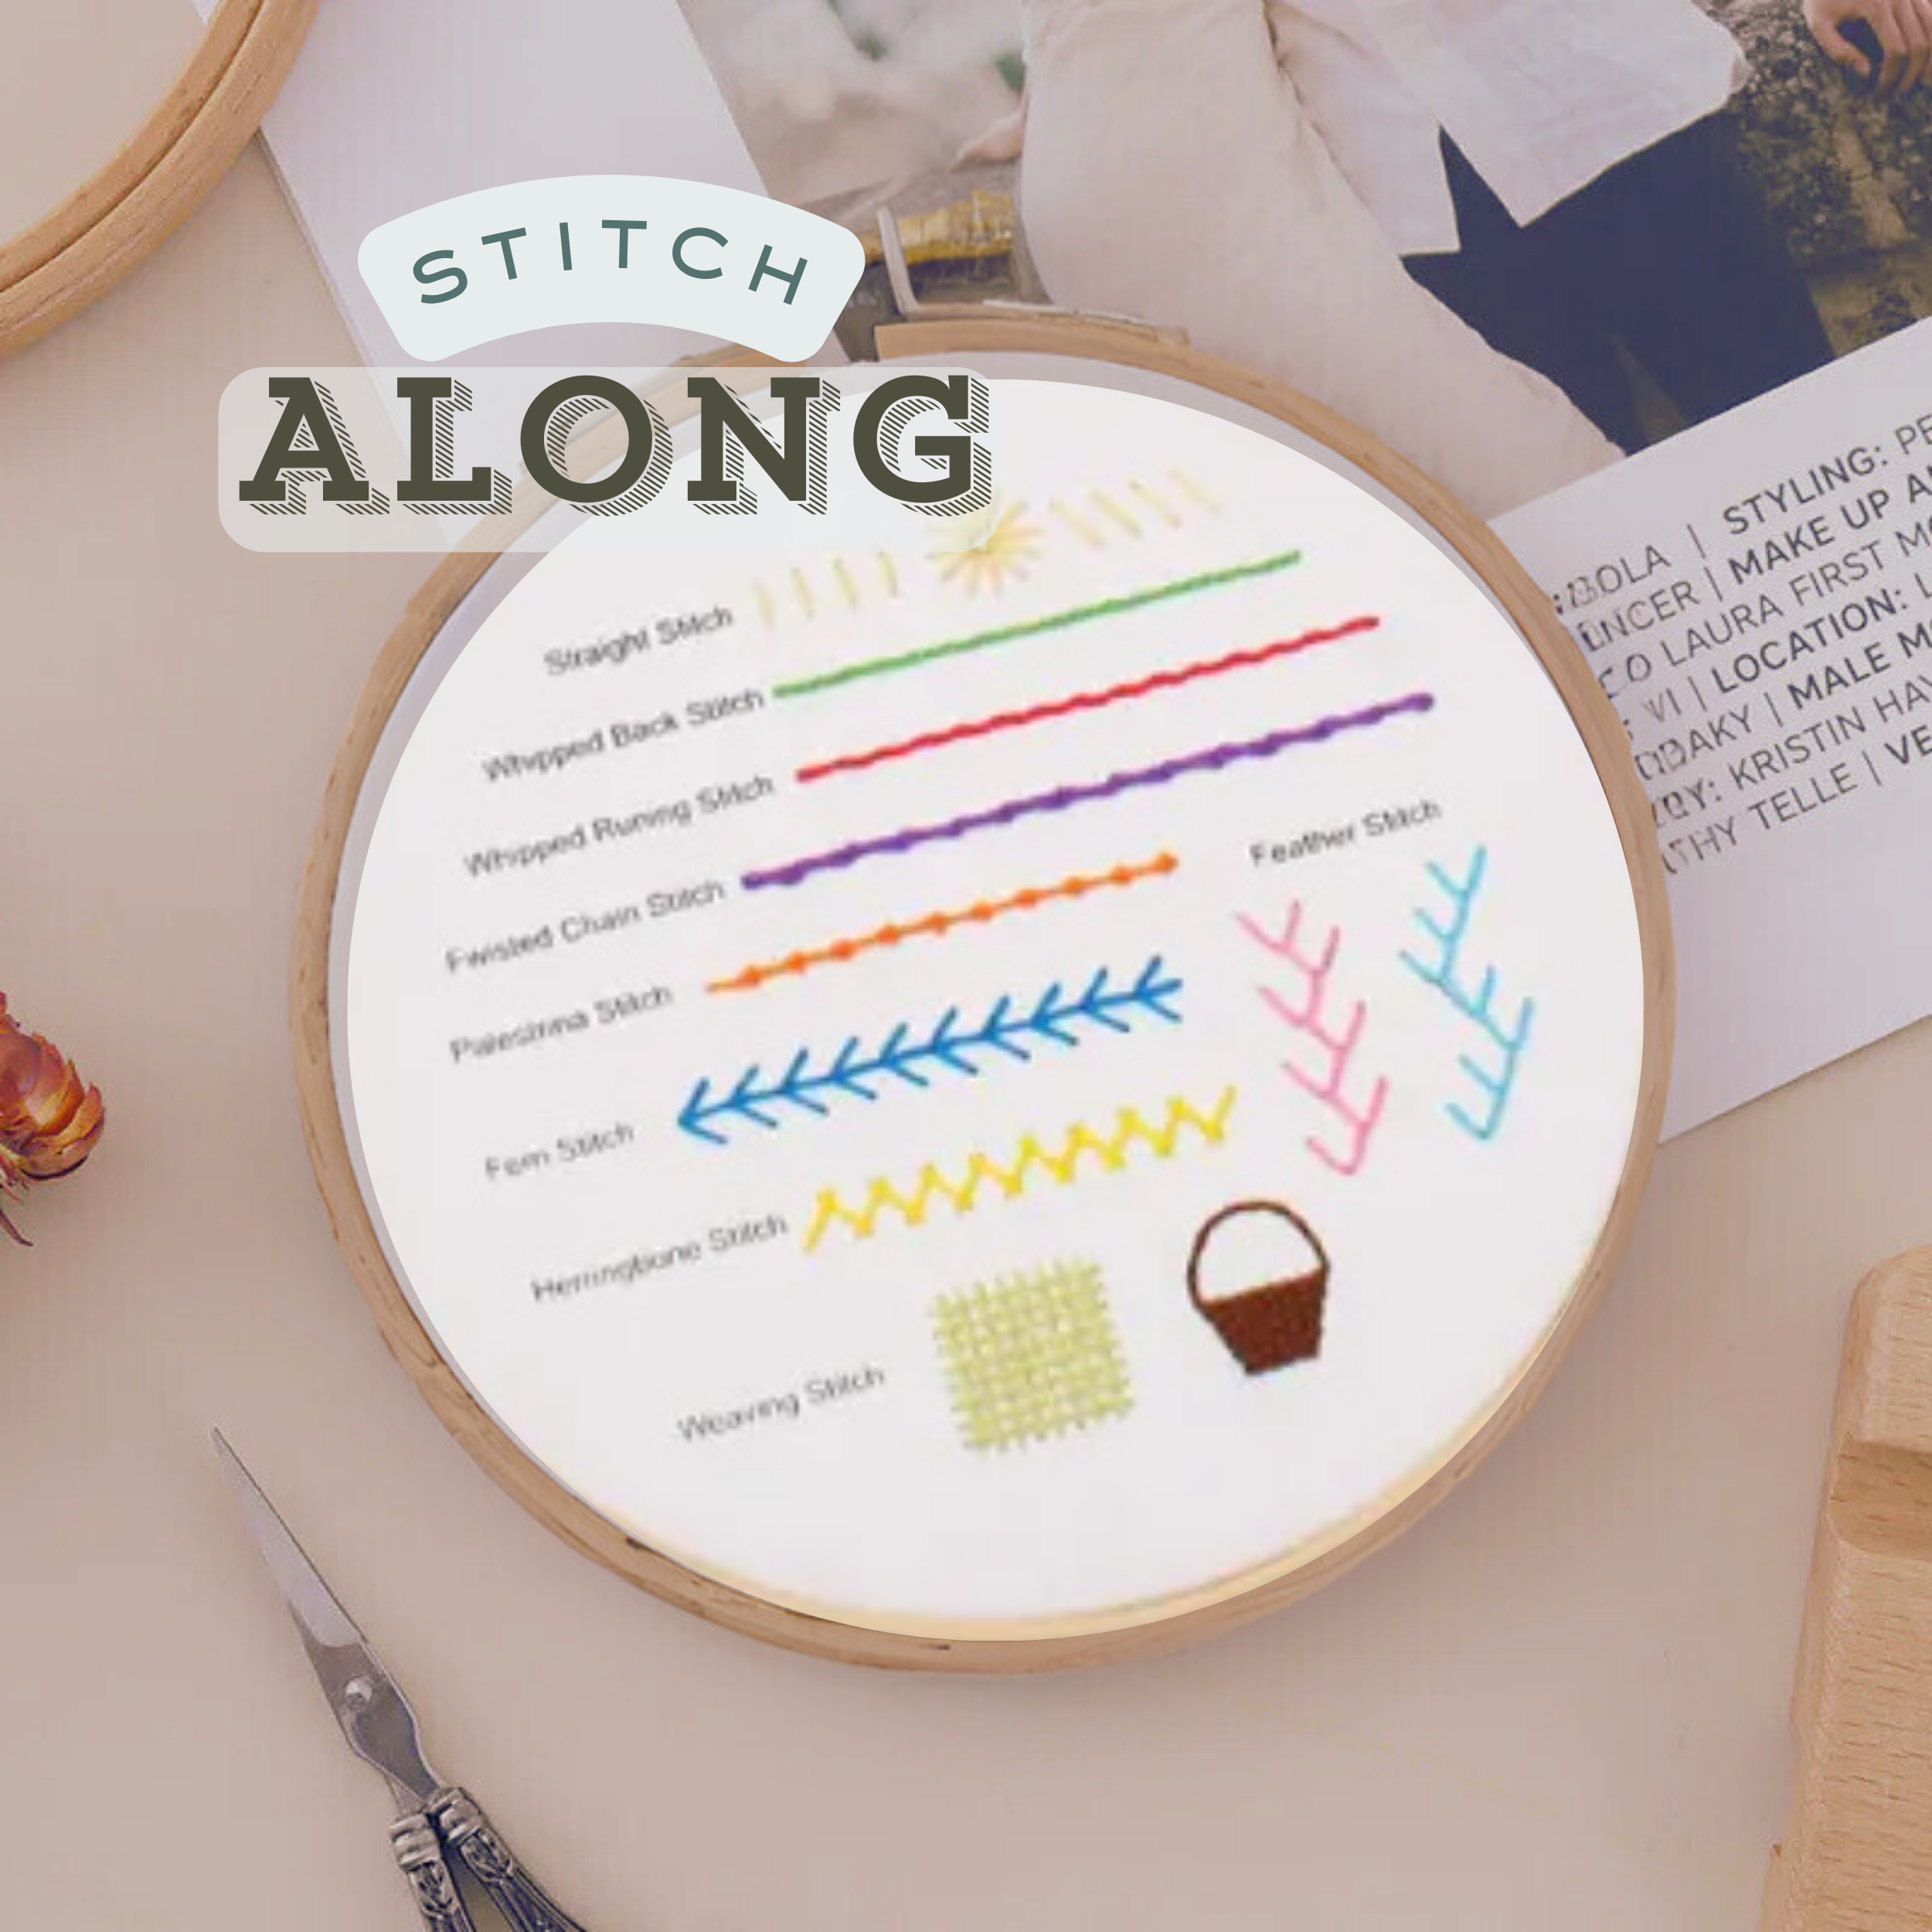
Straight Stitch
The straight stitch is the most basic and essential embroidery stitch. It’s made by bringing the needle up through the fabric and down again in a single movement, creating a straight line of thread on the surface.
To work the straight stitch, decide on the length you want, bring the needle up at your starting point, then insert it back into the fabric at the end point of the stitch. Repeat as needed to create single marks, radiating patterns, or filled areas.
This stitch is simple yet versatile — often used for adding texture, forming patterns, or building the foundation of more complex stitches.
Uses: texture, outlining, filling shapes, decorative details.
Whipped Backstitch
The whipped backstitch is a decorative variation of the classic backstitch. By weaving a second thread through the backstitch line, it creates a smooth, rope-like effect that adds texture and dimension to your embroidery.
To work the whipped backstitch, first complete a row of backstitch. Then, using a new thread, bring the needle up at the start of the line. Weave the needle under each backstitch (without piercing the fabric), always in the same direction, until the line is fully “whipped.”
This stitch is strong, stylish, and versatile — perfect for outlines, lettering, or adding bold decorative details.
Uses: outlining, lettering, borders, decorative accents.
Whipped Running Stitch
The whipped running stitch is a fun variation of the running stitch that creates a smooth, twisted line with a slightly raised effect. By weaving a second thread through the running stitches, you transform the dashed line into a continuous, decorative border.
To work the whipped running stitch, first complete a row of running stitch. Then, using a new thread, bring the needle up at the start of the line. Weave the needle under each stitch (without piercing the fabric), always from the same side, until the entire row is whipped into a flowing line.
This stitch is easy, decorative, and versatile — perfect for borders, outlines, and adding colorful accents.
Uses: borders, outlines, decorative details, colorful accents.
Twisted Chain Stitch
The twisted chain stitch is a decorative variation of the basic chain stitch. It creates a textured line of linked stitches with a distinctive twisted look, adding movement and interest to your embroidery.
To work the twisted chain stitch, bring the needle up through the fabric at your starting point. Form a loop of thread, then insert the needle slightly ahead along your line, catching the loop underneath the needle as you pull through. Instead of keeping the loop flat (like in a regular chain stitch), twist the loop slightly before securing it. Repeat for each stitch to build a continuous, twisted chain.
This stitch is eye-catching and versatile — perfect for outlines, borders, or adding unique texture to motifs.
Uses: outlines, borders, textured lines, decorative accents.
Palestrina Stitch
The Palestrina stitch is a beautiful knotted line stitch that creates a textured, beaded effect. Each stitch forms a small knot along the line, making it both decorative and durable.
To work the Palestrina stitch, bring the needle up at your starting point and make a short diagonal stitch forward. Before pulling the thread tight, loop the needle under the stitch to form a knot. Continue working small diagonal stitches in a row, always looping under each stitch in the same way, to build a line of evenly spaced knots.
This stitch adds texture and interest wherever it’s used — perfect for borders, outlines, or adding raised detail to floral and decorative designs.
Uses: borders, outlines, textured lines, decorative details.
Fern Stitch
The fern stitch is a delicate, branching stitch that resembles the fronds of a fern. It’s worked in a series of angled stitches radiating from a central line, creating a natural, feathery effect.
To work the fern stitch, bring the needle up at the center point of your line. Make a short diagonal stitch to one side, then bring the needle up again at the center just below the first stitch. Make a diagonal stitch to the opposite side, then return to the center again, slightly further down the line. Repeat this pattern — left, right, center — to form the branching effect.
This stitch is graceful and organic — perfect for embroidering leaves, branches, and botanical details.
Uses: leaves, stems, borders, decorative botanical motifs.
Herringbone Stitch
The herringbone stitch is a crossed, open stitch that forms a zigzag pattern resembling woven fabric. It’s versatile for borders, fillings, or adding a decorative crisscross effect.
To work the herringbone stitch, bring the needle up at the top left of your line. Insert it diagonally down to the right, then bring it up again a little lower on the opposite side. Continue crossing back and forth, working diagonally in a zigzag motion, keeping the stitches evenly spaced and angled.
This stitch is light and decorative, perfect for creating open fillings, textured borders, or adding a lacy effect to embroidery.
Uses: borders, decorative lines, filling shapes, textured patterns.
Weaving Stitch
The weaving stitch is a decorative filling technique that creates a woven, textured effect by threading floss over and under a foundation of straight stitches. It’s great for adding dimension and a fabric-like look to your embroidery.
To work the weaving stitch, first lay down a set of parallel straight stitches side by side to form a base. Then, with a new thread, bring the needle up at one edge of the base. Weave the thread over and under the foundation stitches in a row, then turn and weave back again in the opposite direction. Continue until the area is filled, keeping the weaving thread snug but not too tight.
This stitch is bold and textured — perfect for filling shapes, creating basket-like patterns, or adding standout details.
Uses: filling shapes, textured effects, decorative patterns, bold details.
Feather Stitch
The feather stitch is an open, branching stitch that creates a soft, flowing line. Its alternating loops give it a light, feathery appearance, making it perfect for organic and decorative designs.
To work the feather stitch, bring the needle up at the top of your line. Insert it slightly to one side and a little lower, catching the working thread under the needle to form an open loop. Bring the needle up on the opposite side at the same level, again catching the thread to create a loop. Continue alternating from side to side, working down the line in even, open stitches.
This stitch is graceful and versatile — often used for borders, vines, or botanical motifs. It can also be layered for a fuller, decorative effect.
Uses: borders, vines, stems, decorative patterns, botanical details.
Embroidery Tools and Supplies
-
ABS Plastic Embroidery Hoop Frame
Regular price From $12.99 USDRegular price$14.44 USDSale price From $12.99 USDSale -
🌿 Nan Bamboo Embroidery Hoop
Regular price From $11.99 USDRegular price$13.88 USDSale price From $11.99 USDSale -
Automatic Needle Threader Set
Regular price $15.99 USDRegular price$17.27 USDSale price $15.99 USDSale
And Even
More Stitches

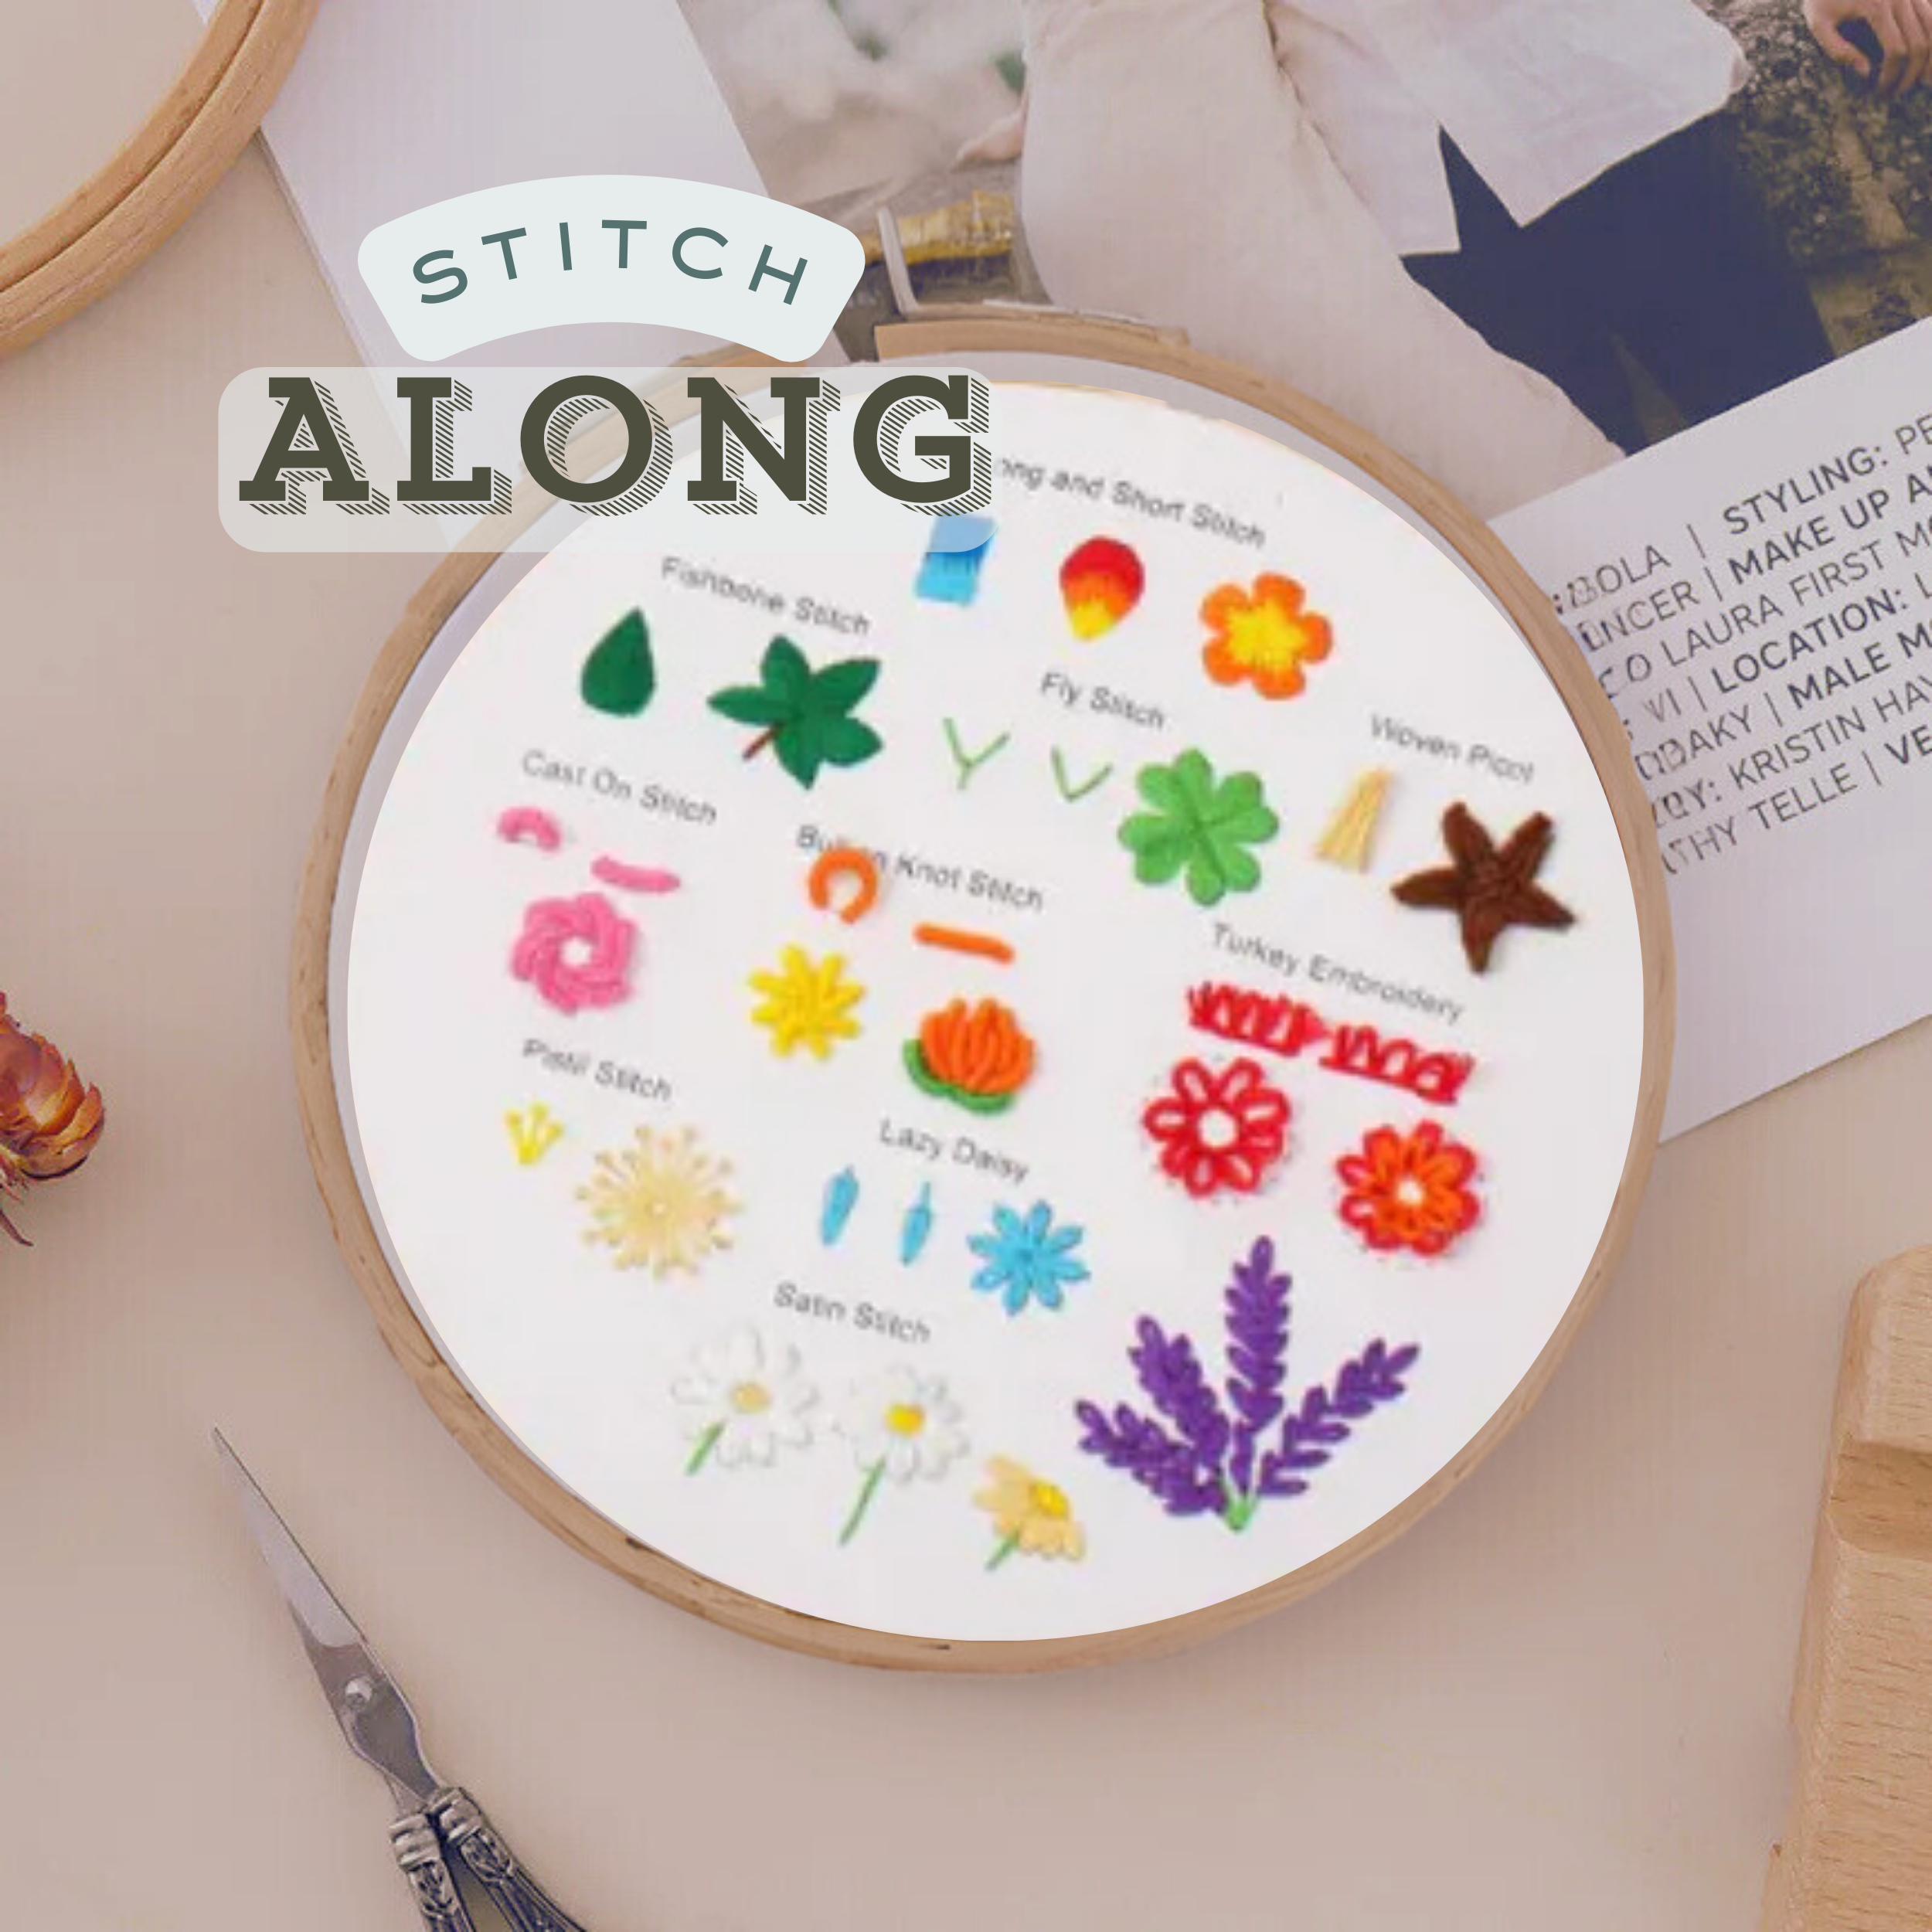
Long and Short Stitch
The long and short stitch is a versatile filling stitch used to create smooth shading and blended color effects. By alternating longer and shorter stitches, it produces a natural, soft texture that’s ideal for realistic embroidery.
To work the long and short stitch, bring the needle up at the edge of the shape you want to fill. Make a stitch across into the shape, varying the length between long and short. On the next row, overlap the stitches slightly, again mixing lengths so the rows blend together. Continue layering stitches, often using multiple thread colors, to create a shaded effect.
This stitch is perfect for filling large areas and achieving a painterly look in embroidery. It’s especially useful for flowers, leaves, and motifs that require smooth transitions of color.
Uses: filling shapes, shading, blending colors, creating realistic effects.
Fishbone Stitch
The fishbone stitch is a filling stitch that creates a smooth, textured finish with a central vein — perfect for leaves, petals, and natural shapes. Its overlapping pattern mimics the look of a fishbone, giving both strength and detail to the design.
To work the fishbone stitch, bring the needle up at the top point of the shape. Make a small diagonal stitch to one side, then bring the needle up again just next to the starting point. Make a diagonal stitch to the opposite side, slightly overlapping the first stitch and crossing over the center. Continue working down the shape, alternating sides, with each stitch crossing over the middle vein.
This stitch creates a neat, filled look with a built-in center line, making it ideal for botanical embroidery.
Uses: leaves, petals, natural shapes, decorative filling.
Fly Stitch
The fly stitch is a simple, versatile stitch shaped like a “V.” It can be worked singly for small details or in a row to create borders and decorative patterns.
To work the fly stitch, bring the needle up through the fabric at your starting point. Insert it a short distance away to form a straight stitch, but keep a loop of thread loose on the surface. Bring the needle up just below the center of the loop and catch it with a small stitch to hold the “V” shape in place. Repeat in sequence to form a line of evenly spaced fly stitches.
This stitch is flexible and decorative — perfect for creating leaves, branches, borders, or scattered accents.
Uses: borders, scattered motifs, leaves, branches, decorative details.
Woven Picot
Cast-on Stitch
The cast-on stitch is a raised, textured stitch that creates loops resembling little coils or knots. It adds beautiful dimension to embroidery, especially for flowers, buds, and decorative accents.
To work the cast-on stitch, bring the needle up through the fabric at your starting point. Insert it back into the fabric a short distance away, but do not pull the thread all the way through. With the needle still above the fabric, wrap the working thread around the needle several times (these are the “cast-ons”). Gently pull the needle through the wraps to form a coiled loop, then anchor it into the fabric at the end point.
This stitch produces a three-dimensional effect that is both delicate and eye-catching — perfect for floral embroidery and textured details.
Uses: flower petals, buds, textured accents, raised details.
Turkey Stitch
The turkey stitch is a raised, looped stitch that creates a fluffy, tufted effect on the surface of the fabric. It’s perfect for adding texture, dimension, and a rug-like look to embroidery.
To work the turkey stitch, bring the needle up at your starting point. Make a small stitch across the surface, leaving a loose loop of thread on top of the fabric. Bring the needle back up just beside the loop and take a tiny anchoring stitch over the working thread to secure it. Repeat this process in rows, leaving loops of even size. Once finished, the loops can be left as they are for a textured effect or cut open and trimmed to form a soft, velvety pile.
This stitch is bold and highly textural — often used for animal fur, hair, rugs, or any detail that calls for a fluffy finish.
Uses: fur, hair, textured details, rugs, raised accents.
Pistil Stitch
The pistil stitch is a variation of the French knot combined with a straight stitch. It creates a tiny knot at the tip of a straight line, giving a delicate, elongated look that’s perfect for floral embroidery.
To work the pistil stitch, bring the needle up through the fabric at your starting point. Wrap the thread around the needle once or twice, as you would for a French knot. Insert the needle back into the fabric a short distance away, holding the wraps in place as you pull through. This creates a small straight stitch with a knot at the end.
This stitch is simple but elegant — ideal for flower centers, buds, or any design that needs fine dotted details with a little dimension.
Uses: flower centers, buds, delicate details, decorative accents.
Lazy Daisy
The lazy daisy stitch is a variation of the chain stitch, worked singly to form petals, leaves, or small decorative loops. It’s one of the most popular stitches for floral embroidery because of its simplicity and charm.
To work the lazy daisy stitch, bring the needle up at the starting point. Insert it back into the same hole (or just beside it), then bring the needle up again a short distance away, catching the working thread under the needle to form a loop. Anchor the tip of the loop with a small straight stitch to hold it in place.
This stitch is quick, easy, and versatile — perfect for stitching daisies, leaves, or scattered motifs.
Uses: flower petals, leaves, small motifs, decorative accents.

More Practice
This second sampler gives you another chance to practice essential stitches, refine your technique, and watch your embroidery skills bloom. It’s the perfect way to build confidence, play with colors, and create a beautiful piece while you practice.
Final Touches
Finishing the Back of Hooped Embroidery
This video shows you how to neatly finish the back of your embroidery work while it’s still in the hoop. You’ll learn how to secure threads, trim excess, and stabilize loose stitches so that your project looks clean inside and out.


